
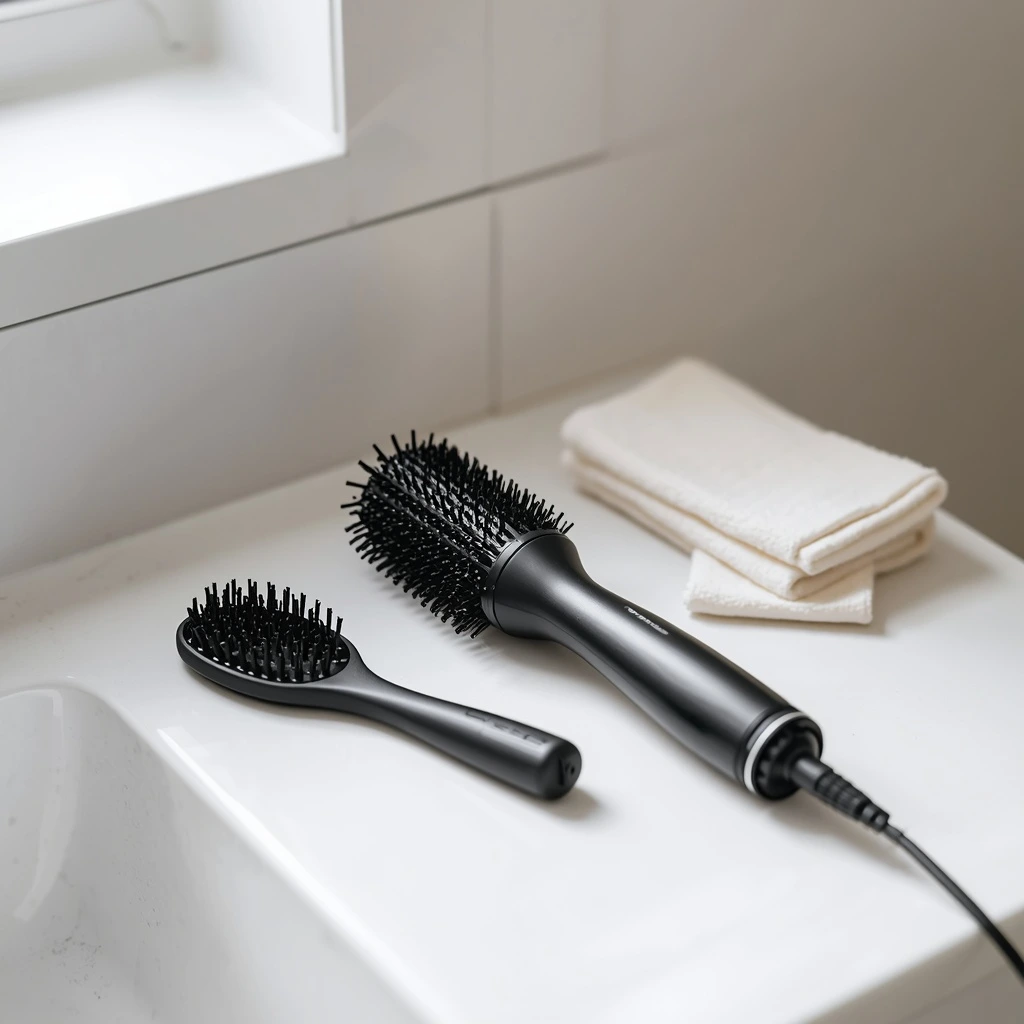
Keep your hot air brush performing like new, fix the most common problems at home, and know exactly when it is time to replace it.
Introduction
A hot air brush (also called a hot air styler, dryer brush, or volumizing brush) is one of the hardest-working tools in your styling kit. It dries, smooths, and shapes hair in a single step, which also means it pulls in air, hair, dust, and product residue every single time you use it.
Most hot air brush “failures” are not manufacturing defects. They are the result of clogged filters, hair wrapped around the barrel, product buildup, or a damaged cord. The good news: nearly all of these are preventable, and many are fixable in under ten minutes without special tools.
This guide covers:
- How your hot air brush works (so troubleshooting makes sense)
- A simple maintenance schedule you can actually stick to
- Step-by-step deep cleaning
- A symptom-by-symptom troubleshooting section
- Safety rules and warning signs
- When to repair, when to replace, and how to make your brush last for years
Safety first: Always unplug the brush and let it cool completely before cleaning, inspecting, or troubleshooting. Never submerge the handle or body in water.
Table of Contents
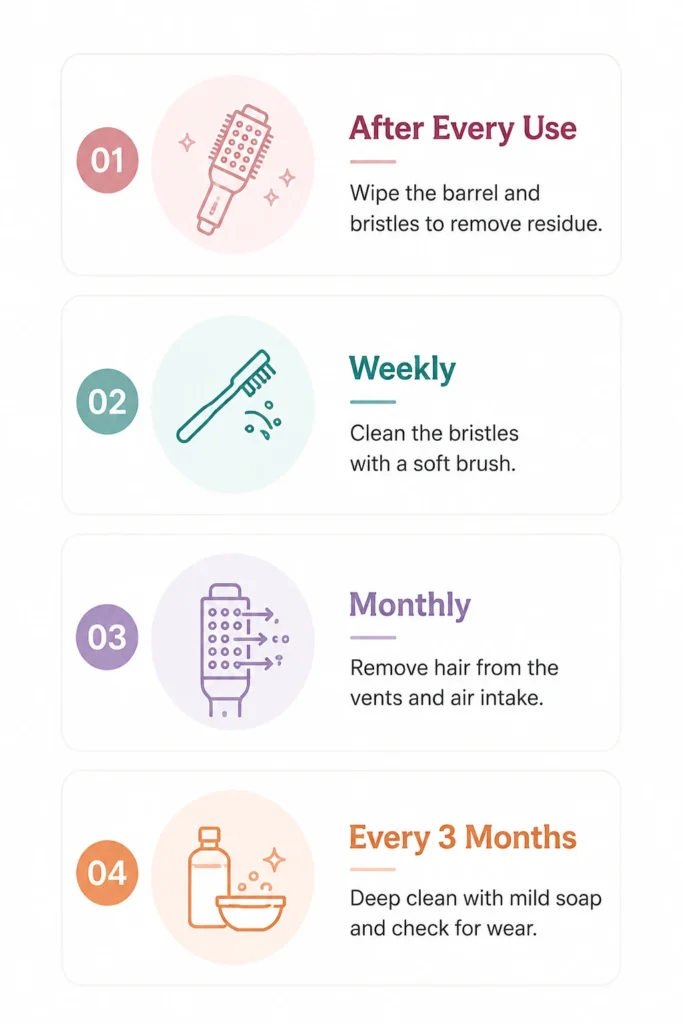
Quick Reference: Maintenance Schedule
| When | What to do | Time needed |
|---|---|---|
| After every use | Unplug, cool, remove loose hair from bristles, and wipe the surface. | 1–2 minutes |
| Weekly | Clean the air intake filter/vent and comb out trapped hair from the brush head. | 3–5 minutes |
| Monthly | Deep clean the brush head (if removable), wipe the barrel, and inspect the cord and plug. | 10–15 minutes |
| Every 3 months | Full inspection of attachments, switches, and airflow; check for loose parts | 10 minutes |
| Every 12–24 months | Evaluate performance and consider replacement if heat or airflow has declined. | — |
Part 1: How a Hot Air Brush Works (and Why It Fails)
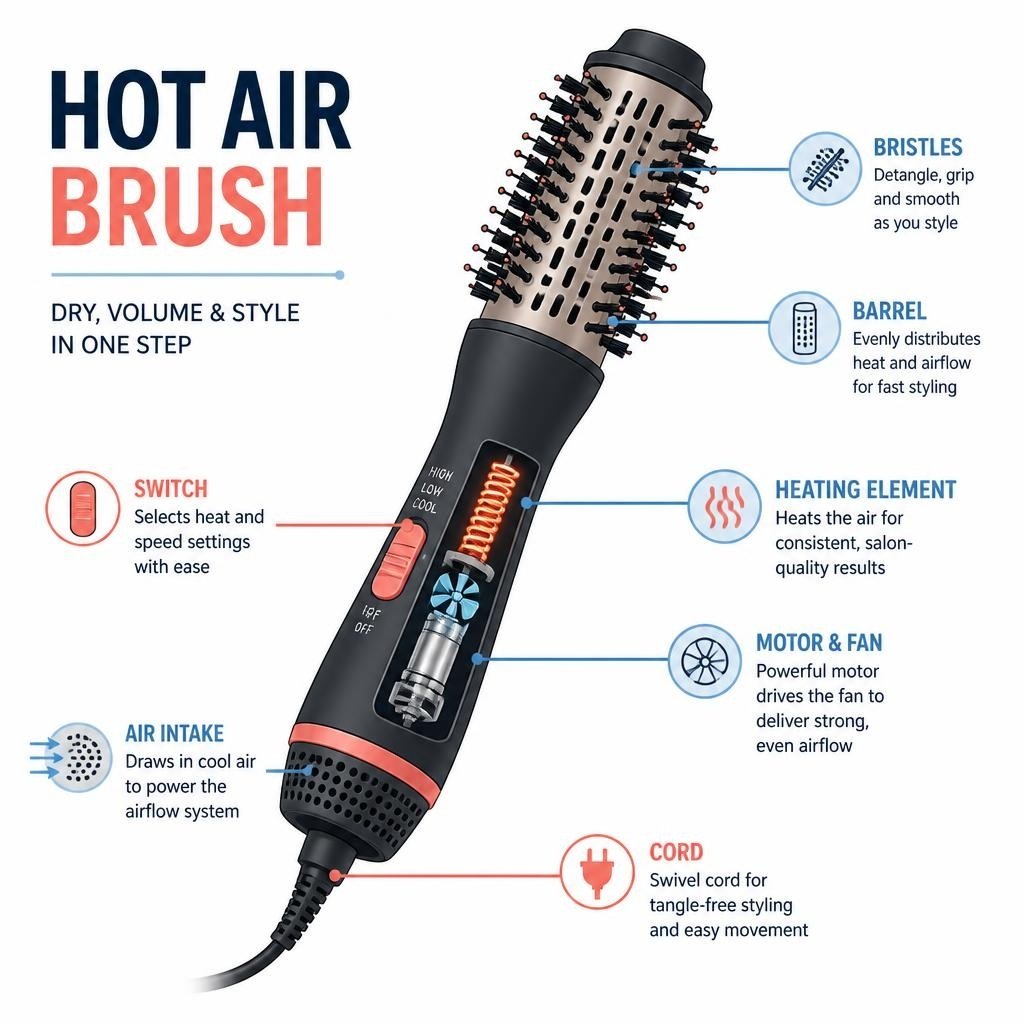
Understanding the basic parts makes it much easier to diagnose problems.
1. Motor and fan. A small motor spins a fan that draws air in through a vent at the back or base of the handle.
2. Heating element. Air passes over a heating coil (or ceramic element) and is warmed before leaving through vents in the brush barrel.
3. Air intake filter or vent. A mesh or slotted cover that keeps hair and dust out of the motor. This is the most commonly clogged part.
4. Thermal fuse or thermostat. A safety component that cuts power if the unit gets too hot. When airflow is blocked, this is what shuts your brush off.
5. Brush barrel and bristles. Usually ceramic, tourmaline-coated, or aluminum, with nylon, boar, or mixed bristles. Some models rotate (oscillating or auto-rotating brushes) and have an additional small motor or gear mechanism.
6. Switches, cord, and plug. Control power, heat, and speed settings. Cords are a common wear point, especially at the base of the handle.
The golden rule: a hot air brush needs a free flow of air in order to stay cool. Almost every overheating, shut-off, weak airflow, or burning-smell problem traces back to blocked airflow.
Part 2: Routine Maintenance
After Every Use (1–2 minutes)
- Switch off and unplug. Don’t yank the cord; pull the plug itself.
- Let it cool completely. Cleaning a hot barrel can damage bristles and burn your fingers.
- Remove hair from the bristles. Use the tail of a comb or your fingers to lift out trapped strands.
- Wipe the surface. A slightly damp, soft cloth removes oils and product residue from the barrel and handle. Dry it before storing.
- Store properly. Loop the cord loosely (see storage tips in Part 6).
Weekly (3–5 minutes)
- Clean the air intake. Locate the vent or filter. Use a dry toothbrush or small soft brush to dislodge lint and hair. If the cover is removable, take it off and clean both sides.
- Vacuum if needed. A small brush attachment on a vacuum cleaner works well to remove fine dust.
- Check airflow. Turn the brush on at low heat and hold your hand in front of the vents. The airflow should feel steady and even.
Monthly (10–15 minutes)
- Deep clean the brush head (see Part 3).
- Inspect the cord along its full length. Look for cracks, exposed wire, kinks, or flattened sections.
- Check the plug. Prongs should be straight and clean, with no discoloration or melting.
- Test every switch and setting. Heat levels, speed settings, and rotation (if applicable) should respond immediately.
Part 3: Deep Cleaning Step by Step
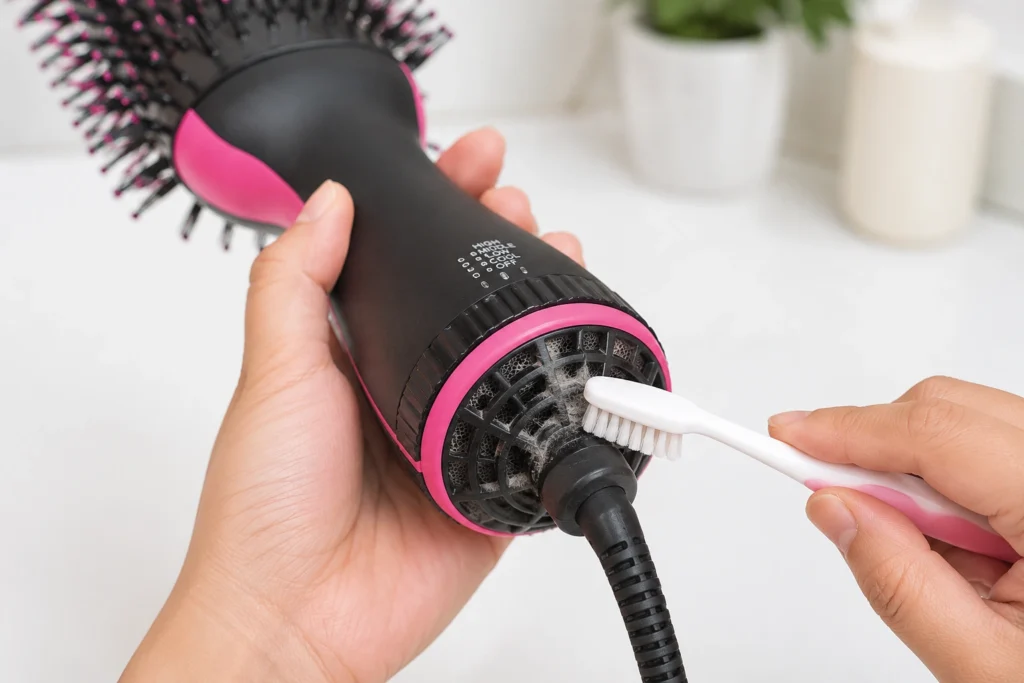
Deep cleaning removes the product buildup (hairspray, serums, dry shampoo, and heat protectant) that dulls performance and can cause hair to snag.
What you’ll need
- Mild shampoo or gentle dish soap
- Warm water and a bowl
- Soft toothbrush
- Microfiber cloth
- Cotton swabs
- Comb with a pointed tail
- Optional: small amount of isopropyl alcohol on a cloth (for the barrel only, not the bristle base or plastic housing if the manual advises against it)
Steps for removable brush heads
- Unplug and cool the unit.
- Detach the brush head according to your manual.
- Remove all hair from the bristles and base.
- Soak the head in warm, soapy water for 5–10 minutes. Do not use hot water, which can warp plastic and loosen glue.
- Scrub gently with a toothbrush between bristles and around the base.
- Rinse under lukewarm water.
- Dry completely. Pat with a towel and air dry fully (several hours or overnight) before reattaching. Trapped moisture can cause odors and electrical issues.
Steps for fixed brush heads
- Never submerge the brush.
- Dampen a cloth with warm soapy water, wring it out well, and wipe the barrel and bristles.
- Use cotton swabs and a toothbrush to clean between bristles.
- Wipe again with a cloth dampened with plain water, then dry thoroughly.
Cleaning the handle and vents
- Wipe the handle with a barely damp cloth.
- Use a dry brush or compressed air (short bursts, from a distance) on the vents.
- Never push pins, needles, or metal objects into the vents. You may damage the heating element or create a shock hazard.
What NOT to do
- Don’t use abrasive pads or harsh chemicals on the barrel coating.
- Don’t wet the handle, switch area, or cord.
- Don’t plug the brush in until every part is completely dry.
- Don’t open sealed housings unless the manufacturer explicitly says it’s user-serviceable. It may void your warranty and is a safety risk.
Part 4: Troubleshooting Guide (Symptom → Cause → Fix)
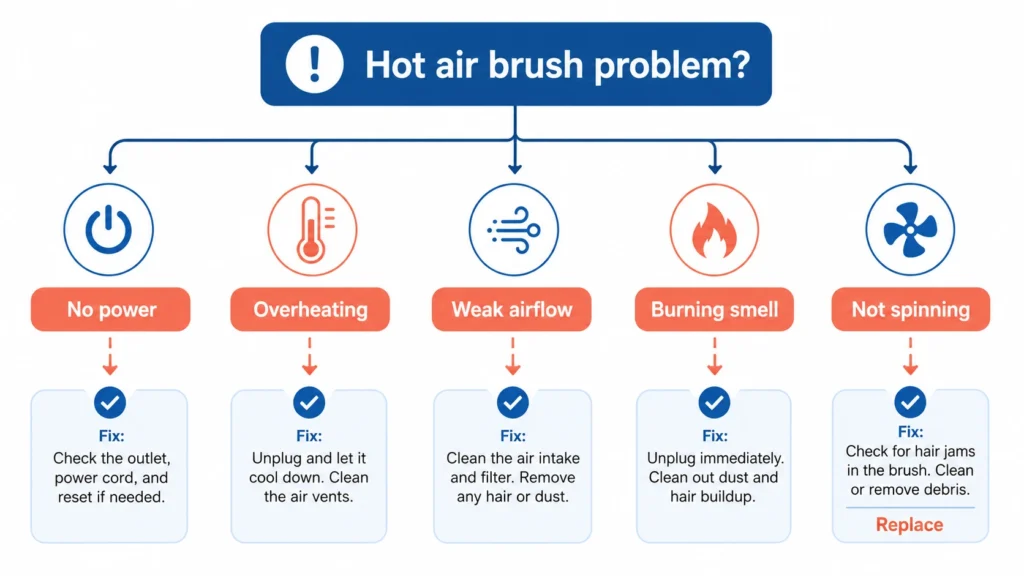
Start with the problem you’re experiencing. In every case, unplug the brush first.
Problem 1: The Brush Won’t Turn On
Possible causes
- The outlet or power strip isn’t working.
- Tripped plug safety device (some plugs have a built-in reset button)
- Overheat protection has triggered
- Damaged cord or switch
- Failed internal fuse or motor
What to try
- Test the outlet with another device.
- Check the plug. If it has a reset or test button, press reset firmly.
- Let the brush cool for 30 minutes, then clean the air intake and try again. If it was cut off by the thermal fuse, it may recover once airflow is restored.
- Check the cable and plug carefully for any signs of wear, fraying, cracks, or other damage before use. If you see any exposed wire, stop using the brush.
- Check the switch. If it feels loose or sticky or doesn’t click, it may be worn out.
Want the full step-by-step version? Our guide on why a hot air brush won’t turn on and the 7 quick fixes to try walks through each check in order, with a symptom chart.
When to replace: If none of the above helps, or if the cord is damaged, replace the unit. A failed internal fuse is usually not worth repairing.
Problem 2: The Brush Overheats or Shuts Off Mid-Use
Likely causes
- Clogged air intake (most common)
- Hair wrapped around internal parts
- Using high heat for too long
- Failing thermostat
Fixes
- Unplug and let it cool for at least 30 minutes.
- Clean the air intake thoroughly (Part 2).
- Check that nothing is blocking the barrel vents.
- Use a lower heat setting and avoid holding the brush in one spot.
- Test again. If it still cuts out within a few minutes, the thermostat or fan may be failing.
Prevention: Clean the intake weekly. If you have long or thick hair, or you style daily, clean it more often.
Problem 3: Weak Airflow or Slow Drying
Likely causes
- Dirty or clogged filter
- Product residue on the vents
- Motor wearing out
- Wrong voltage (see Problem 10)
Fixes
- Clean the intake and barrel vents.
- Check whether the unit is actually on the highest speed setting.
- Try a different outlet.
- If airflow is still weak after cleaning, the fan or motor may be worn out. This is common after several years of heavy use.
Problem 4: Burning Smell
A faint “new product” smell during the first few uses is normal as manufacturing residues burn off. Otherwise, a burning smell is a warning sign.
Common causes
- Hair or lint burning on the heating element
- Product buildup on the barrel
- Overheating from blocked airflow
- Electrical fault
What to do
- Switch off and unplug immediately.
- Clean the air intake and vents thoroughly.
- Clean product buildup from the barrel.
- Test briefly on low heat in a well-ventilated area.
Stop using the brush permanently if you notice:
- A sharp, acrid or “electrical” smell
- Smoke
- Sparks
- A very hot handle or cord
These signs can indicate a serious electrical fault.
Problem 5: The Brush Doesn’t Rotate (Rotating Models)
Likely causes
- Hair wrapped around the rotation mechanism
- Rotation switch set incorrectly
- Worn gears or a failed rotation motor
- Brush head not correctly attached
Fixes
- Take off the brush head, then reattach it and make sure it clicks firmly into place.
- Remove tangled hair from the base of the barrel using the tail of a comb or tweezers.
- Check that you’ve selected the right rotation direction or mode.
- If the barrel stutters or stops under light tension, the rotation motor may be weak. Avoid pulling hard on tangles; let the barrel do the work.
Problem 6: Hair Gets Tangled or Pulled
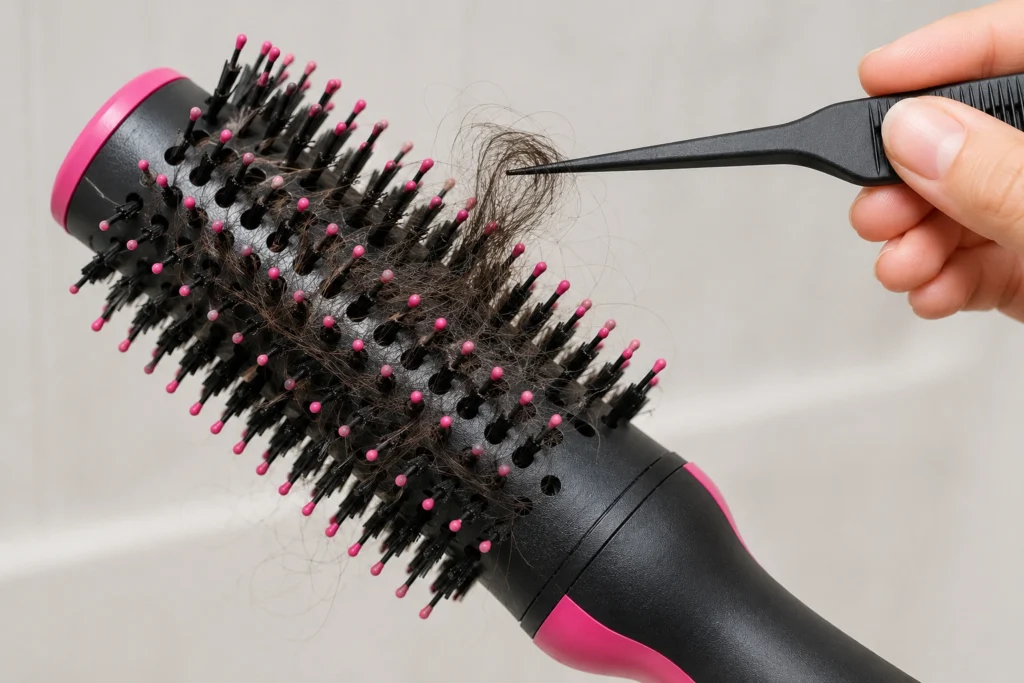
Likely causes
- Too much hair in one section
- The brush you chose may not suit your hair length, which can make styling harder.
- Rotation set to the wrong direction
- Dirty or damaged bristles
Fixes
- Work in smaller sections. Thin sections dry faster and tangle less.
- Detangle first. Towel-dry and comb through before using the brush.
- Use a rotation-safe technique. Move the brush continuously through your hair, and make sure the ends don’t curl around the barrel.
- Choose the right barrel size. Smaller barrels for short hair, larger for long hair.
- Inspect bristles. Bent, melted or sticky bristles snag hair and should be cleaned or the head replaced.
If hair gets stuck: switch off, unplug, then gently unwind it. Don’t try to rotate or pull a stuck brush while it’s running.
Problem 7: Frizz, Static or a Poor Finish
Your brush may be working perfectly, but the results look off.
Possible causes and fixes
- Heat too high: Use a lower heat; high heat can roughen the cuticle and cause frizz.
- Hair too wet: Pre-dry to roughly 60–80% dry with a towel or dryer before using the brush.
- No heat protectant: Apply a heat protectant to damp hair.
- Dirty bristles: Residue transfers back onto your hair and makes it look dull.
- Worn ionic or ceramic coating: Over time, coatings degrade and static increases. This is a normal sign of age.
- Technique: Keep the brush moving and finish with a cool shot to set the style.
Problem 8: Strange Noises (Rattling, Whining, Grinding)
| Sound | Likely cause | What to do |
|---|---|---|
| Rattling | Loose brush head or something lodged inside | Reattach the head; check for debris |
| High whine | Motor under strain from a blocked intake | Clean the intake; if it persists, motor wear |
| Grinding | Worn gears or bearings | Stop use; replace unit |
| Buzzing from the switch | Worn or failing switch | Replace the unit |
Grinding or clicking that gets louder is a sign of internal wear. Continued use may lead to total failure.
Problem 9: Heat Settings Don’t Change
Causes
- Worn selector switch
- Damaged internal wiring
- Failed heating stage
Fixes
- Switch the unit off, wait a few seconds and try again.
- Hold your hand near the airflow (not too close) to check whether temperature changes between settings.
- Wiggle the switch gently while off to see if it feels loose or gritty.
If the temperature does not change between settings, the unit’s internal switch or element has likely failed and replacement is the safest option.
Problem 10: Not Performing Properly While Travelling
Travelling with a hot air brush often reveals voltage issues.
- Single-voltage brushes can be damaged by plugging into a different voltage supply.
- Dual-voltage brushes automatically or manually adjust, but check the label first.
- Plug adapters do not convert voltage. A voltage converter is a separate device.
Symptoms of a voltage mismatch include very weak heat, very weak airflow, or sudden shut-off. If your brush stopped working after a trip, check the label and consider that the unit may have been damaged.
Part 5: Safety Rules and Warning Signs
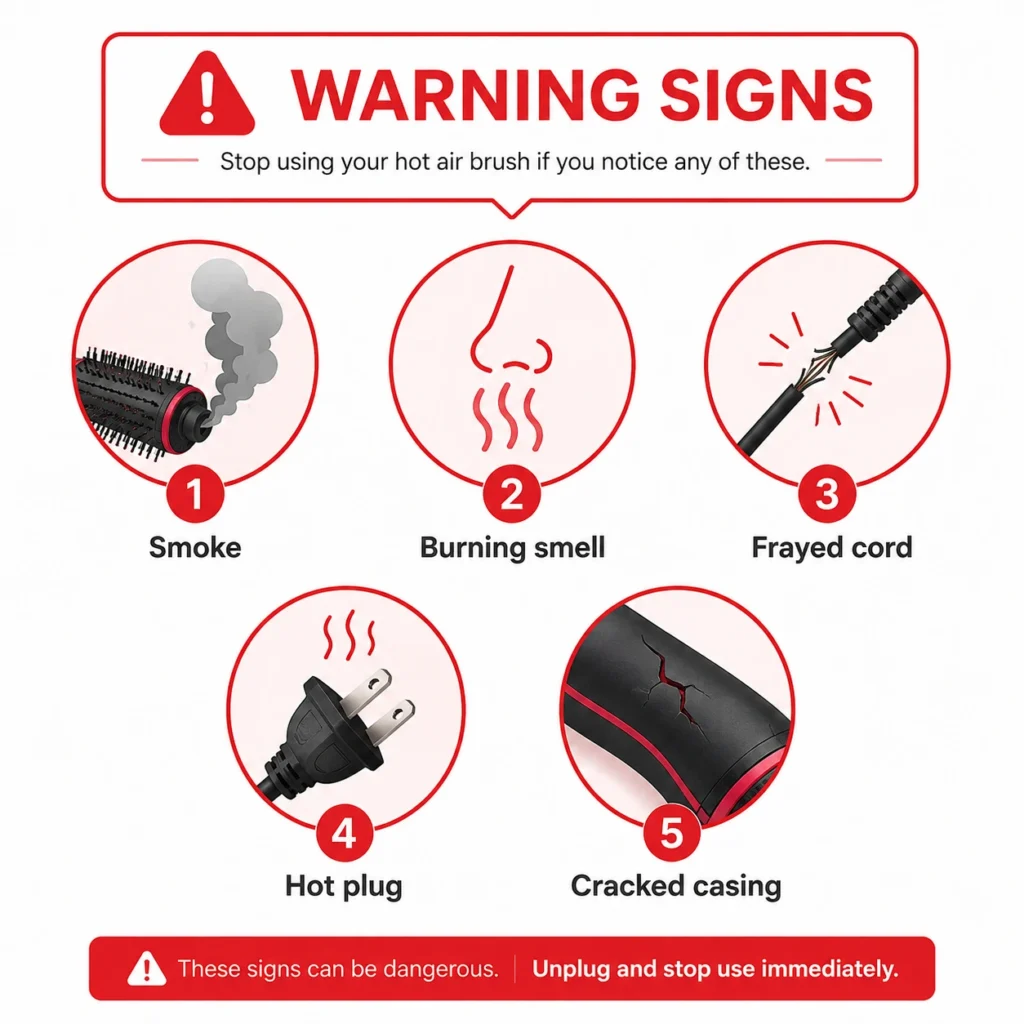
Essential safety rules
- Unplug the brush after every use, not just switch it off.
- Keep it away from water, sinks and baths.
- Never use a brush with a damaged cord or plug.
- Don’t wrap the cord tightly around the handle.
- Don’t leave a hot brush on soft surfaces such as beds or towels.
- Don’t use extension leads that aren’t rated for the appliance.
- Keep out of reach of children.
Stop using immediately if you see or experience
- Smoke, sparks or flames
- A strong burning or electrical smell
- A hot or discoloured plug
- Cracked casing that exposes internal parts
- Exposed or frayed wires
- Tingling or mild shocks when touching the unit
If any of these occur, unplug it safely (if possible), do not use it again, and dispose of it following local electronics recycling guidelines.
Part 6: Making Your Hot Air Brush Last Longer
Storage tips
- Let the unit cool fully before storing.
- Loop the cord loosely. Tight wrapping can break the internal wires at the handle.
- Store in a dry place, away from steam and humidity.
- Use a heat-resistant pouch or hang it from its loop if it has one.
Usage habits that extend lifespan
- Start with towel-dried or partially dry hair. Soaking wet hair makes the motor and heater work harder.
- Use medium heat whenever possible.
- Don’t block the vents with your hand or hair.
- Avoid piling on product, especially oils and sprays, right before brushing.
- Rest the brush for a few minutes during long styling sessions.
Products and residue
Hairspray, dry shampoo and silicone-heavy serums leave a sticky film on bristles and barrels. Cleaning monthly keeps your brush smooth and prevents hair snagging.
Part 7: Repair or Replace?
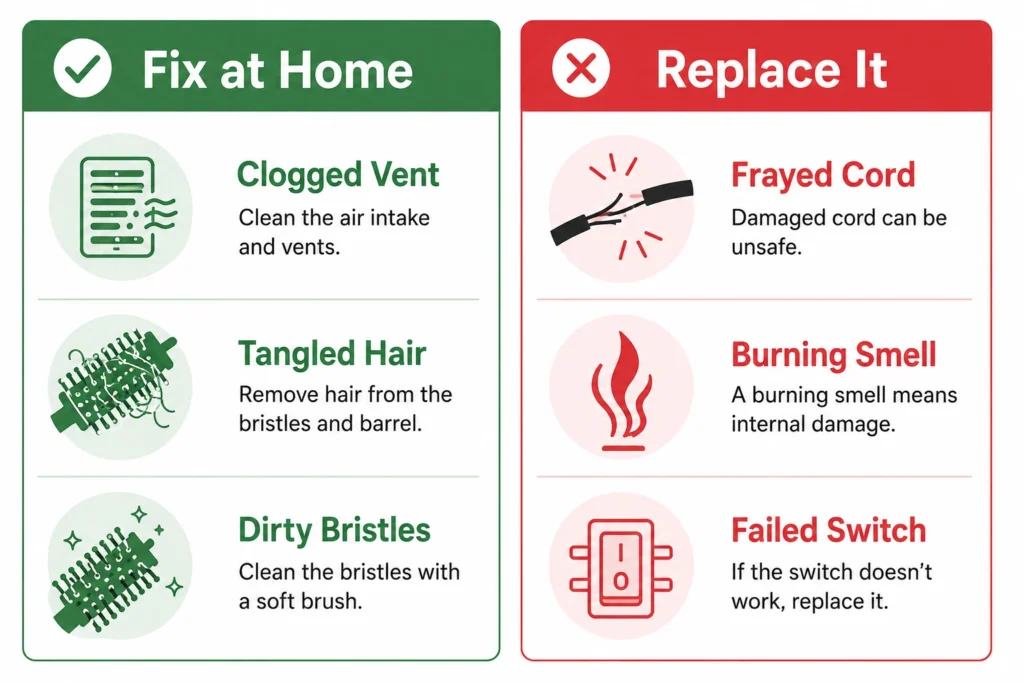
Worth repairing or fixing at home
- Clogged filters or vents
- Tangled hair in the brush head
- Dirty or sticky bristles
- Loose brush head attachment
- Product buildup
Usually better to replace
- Damaged or frayed cord
- Failed switch
- Burning smell that persists after cleaning
- Grinding or failing motor
- Weak heat that doesn’t recover after cleaning
- Cracked or melted housing
Check your warranty
Before buying a new one, check whether your brush is still covered. Many brands offer 1–2 year warranties (some offer more). Keep your receipt and model number, and don’t open the unit yourself, as this can void coverage.
Rule of thumb
If the repair would cost more than about half the price of a new unit, or if the issue is electrical, replace it. A hot air brush is a heat-producing electrical appliance; safety matters more than saving a few dollars.
Frequently Asked Questions
How often should I clean my hot air brush?
Wipe it after each use, clean the air intake weekly, and deep clean the brush head monthly. Heavy users or those with long hair should clean more often.
Can I wash the brush head under running water?
Only if the head is detachable and the manufacturer says it’s safe. Never wet the handle, motor or cord area.
Why does my hot air brush keep turning off?
The most common reason is a clogged air intake triggering the overheat protection. Clean the vents and let the unit cool before trying again.
Why does my brush smell like it’s burning?
Hair, lint or product residue on the heating element is the usual cause. Clean thoroughly. If the smell is sharp, electrical or continues, stop using the brush.
How long does a hot air brush last?
With good care, typically 2–5 years, depending on use and build quality. Daily use and poor maintenance shorten this.
Is it safe to use a hot air brush if the cord is slightly damaged?
No. Damaged insulation can cause shocks or fires. Replace the unit.
Can I use a hot air brush on wet hair?
Most are designed for towel-dried or damp hair. Very wet hair takes much longer and strains the motor.
Do I need to replace the brush head?
If bristles are melted, bent, sticky or falling out, replacing the head (if it’s replaceable) or the whole tool will improve results and protect your hair.
Related Guides
Want to go deeper? These guides cover the topics mentioned above in more detail:
- How to Get Hair Out of a Hot Air Brush
- Blow Dryer Brush Guide: Types, Specs, and How to Choose
- What Is a Hot Air Brush? A Plain-English Guide
- How Does a Hot Air Brush Work? A Plain-English Explainer
- Why Does My Hot Air Brush Tangle My Hair? Causes and Fixes in 2026
Conclusion
A hot air brush rewards a little regular care. Clear the air intake, keep the bristles clean, treat the cord gently and respond quickly to warning signs, and your brush will deliver smooth, voluminous results for years.
Bookmark this guide, set a reminder for your weekly and monthly checks, and when something goes wrong, work through the symptom list above before assuming the brush is broken. Most of the time, the fix is simple.
Pingback: Hot Air Brush Keeps Turning Off? 7 Causes and Fixes
Pingback: Hot Air Brush Burning Smell: Causes, Fixes & When to Stop
Pingback: How to Clean a Hot Air Brush: 6-Step Safe Method
Pingback: How Long Does a Hot Air Brush Last? Signs to Replace
Pingback: Hot Air Brush Not Getting Hot? 7 Fixes to Try First